| The secrets of |  |
Ironing |
|
How to iron a shirt |
| Secrets of Ironing | |
| Ironing of a shirt begins with the cuffs or the collar. What is important is that the work advances quickly and smoothly and the shirt is moved as little as possible. |
| Dampening a shirt | ||
 |
A shirt is evenly dampened with a fine spray throughout. | |
| Watch the video clip » | ||
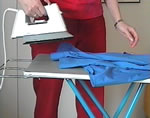
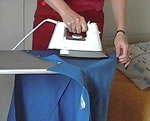
| Ironing sleeves | ||
 |
Ironing a sleeve begins with the cuff. You can make a crease in the sleeve, as in the video clip. However, if you place the crease outside the edge of the ironing board and iron it last, the sleeve will have no crease. |
|
| Watch the video clip » | ||
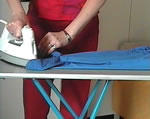
| Ironing a collar | ||
 |
The collar is ironed first on the wrong side and then on the right side. . | |
| Watch the video clip » | ||
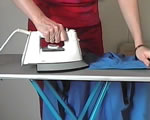
| Ironing shoulders | ||
 |
Iron the shoulders and check the ironing of the upper part of the sleeve at the same time. | |
| Watch the video clip » | ||
| Ironing button rows, a front of a shirt and a back of a shirt | ||
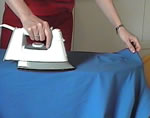 |
Ironing of the large surfaces of a shirt can begin either with the left side or the right side of the front. If the ironing person is right-handed, starting with the right side of the front and moving the shirt away from the self will reduce wrinkling. |
|
| Watch the video clip » | ||
|